- Click here to download AnyDesk.
- The file named anydesk.dmg will download to your Downloads folder. Double-click on that file to open it. A new window opens that looks like this:
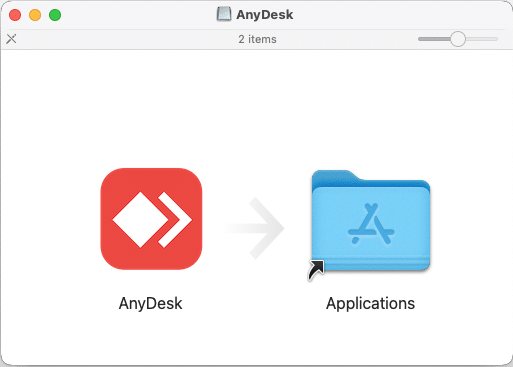
- Drag the red AnyDesk icon on top of the Applications icon to copy the AnyDesk application to your Applications folder.
- When the copying is complete, double-click on the Applications icon to open your Applications folder window. In that window, locate AnyDesk and double-click on it to open it.

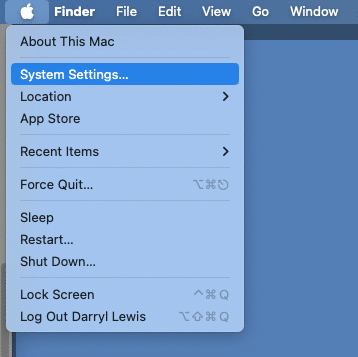
- Because Apple improved security in MacOS 10.15.x (Catalina) and later, you’ll need to give AnyDesk permission to allow us to view your screen remotely, and to allow our mouse and keyboard to control your Mac. Click System Settings… in the Apple menu.
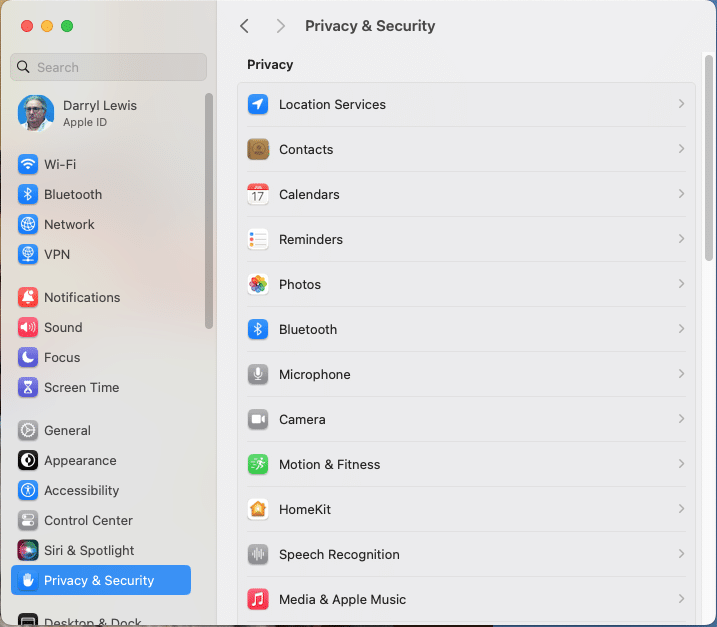
- In the left column of the System Settings window, click on Privacy & Security. The right side of the window will list all the different privacy & security setting that can be configured.
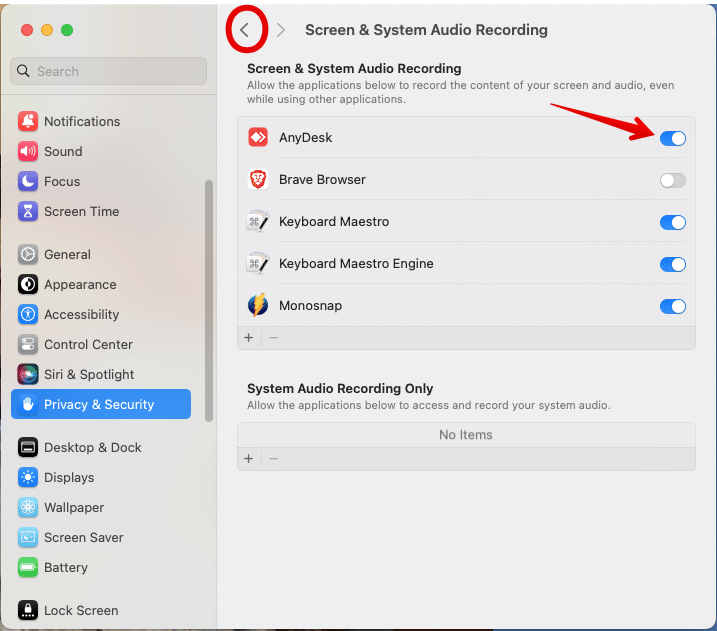
- Scroll down the right side of the window until you see Screen Recording (MacOS 13.x Ventura), or Screen & System Audio Recording (MacOS 14.x Sonoma and 15.x Sequoia). The picture below is from MacOS 14.x Sonoma.

- In the Screen Recording (or Screen & System Audio Recording) window, click the little switch to the right of AnyDesk to turn it on. You will be asked to enter the login password for your Mac to allow making changes to any Privacy & Security preferences…just a security measure.When the switch is on, it has a blue background. A window will appear telling you that AnyDesk must quit and reopen for this change to take effect. For the moment, click the Later button, becuase we have two more preferences to set, and we can quit and reopen AnyDesk after those.
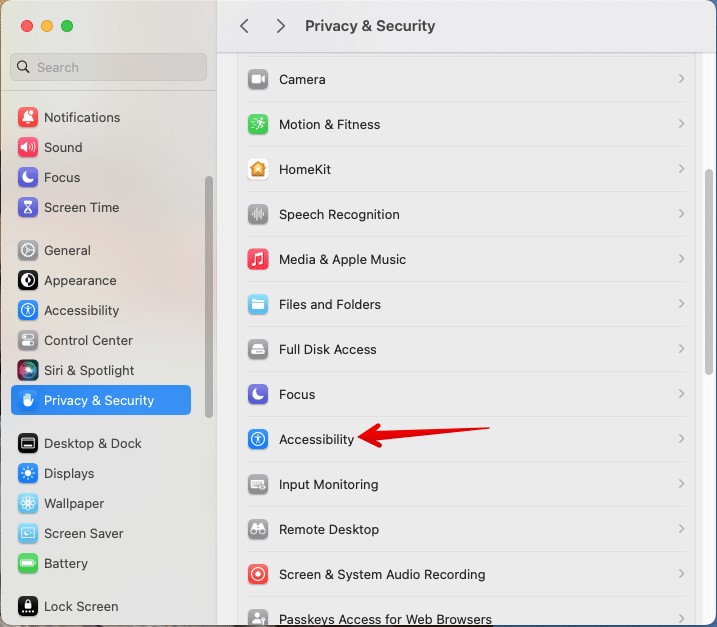
- Now click the left pointing arrowhead next to Screen Recording (or Screen & System Audio Recording) at the top of the window to go back to the list of Privacy & Security preferences. Back in the Privacy & Security list window, click on Accessibility in the right side of the window. Note that there is also an Accessibility listed in the left column, but that’s not the one we want.
- In the Accessibility window, click the, click the little switch to the right of AnyDesk to turn it on. When it’s on, the switch has a blue background. Once the switch is on, click the left pointing arrowhead next to Accessibility at the top of the window to go back to the list of Privacy & Security preferences. We have one more preference to set.

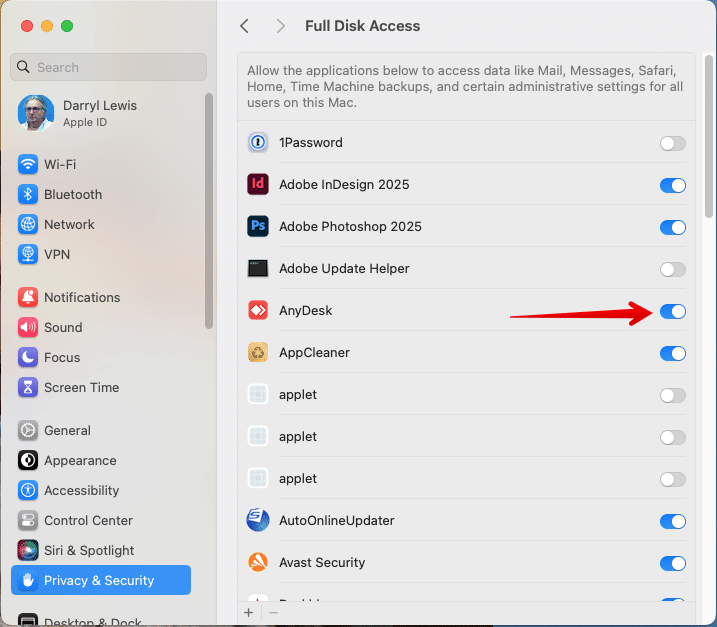
- Back in the Privacy & Security list window, click on Full Disk Access.

- In the Full Disk Access window, click the little switch to the right of AnyDesk to turn it on. When it’s on, the switch has a blue background. Once the switch is on, a window will appear telling you that AnyDesk must quit and reopen for the changes to take affect. This time click the Quit & Reopen button. Then close the System Settings window…we’re done with it.
- When AnyDesk reopens, give us the 9 or 10 digit “Your Address” number from top of the window by calling or texting us at 919-404-0222, or send it by email to support@everythingmacintosh.com.
We’ll attempt to connect to your computer remotely. When we do, a window will appear showing that we’re trying to connect, and you’ll need to click the Accept button to accept our connection.